Before I dive straight into this how-to, let me preface this by saying that I’m a semi-handy guy. My wife finds home renovation ideas on Pinterest (someone please shut that site down), and I learn how to do stuff on YouTube. And with a few minor cuts and occasional profanity, we both manage to find a way to build something together. We call it “relationship building.” Dr. Phil calls it unhealthy.
So if you’re handy and have time on your handy hands, I’m sure you’ve got what it takes to convert most ordinary enclosed trailers into a custom toy hauler. And the best part?! You’ll save some serious cash when compared to the current cost of the run-of-the-mill manufactured toy hauler these days. In fact, I believe most dealerships now accept organs as currency (no gallbladders – I checked).
And that’s exactly why we chose to convert our ordinary enclosed trailer into a toy hauler.
Here’s how we did it.
Step 1 – Source the Perfect Trailer
OK – my craftsmanship and spare time is limited, so we requested that our v-nosed trailer be made with two windows (one on each side), a trailer door with a built-in window and screen door, and a 110v package that included three wall outlets. This particular model automatically came equipped with various stock items; led lights with a battery pack, ceiling vent, dropdown loading door, and a lovely spare tire that’s great at taking up space.

So for just shy of 8.5K (which equates to 12 gallbladders), we rolled off the Fox Trailers lot in Post Falls with a shiny new trailer. It stayed pristine right up to the moment I took it through a coffee hut drive through on the way home. Let’s just say that the top of the trailer “kissed” their metal gutter. And by kissed, it was more of a tongue punch. It kind of put a small hole through the exterior metal. But alas, that’s a story for a separate blog post.
I arrived home with our metal box on wheels, and that’s where the real work began.


Step 2 – From the Ground Up
After taking a gutter to the side of our trailer (I now call it a “custom ventilation hole”), it was time to turn this thing into a toy hauler.
My lovely wife got to work painting the thin wooden walls. She loves painting. In fact, the language she uses is almost as colorful as the paint she uses. However, in this instance, we went with a taupe grey that we had left over in our garage from a previous Pinterest project.
Next? Flooring. We knew we’d need to source some durable, waterproof flooring, which is why we chose TrafficMaster’s vinyl plank flooring.

This material is scratch, stain, and slip resistant and available in a variety of colors. It’s fairly affordable, too. So Trish and myself spent an afternoon feverishly installing this snap-in floating floor. (We were rushing to get this floor in prior to our first camping trip, which was the next day). The installation can be a tad frustrating at times (back to the relationship building comment), but you start to get the hang of snapping the pieces together and occasionally cutting boards as needed.
My only complaint about this particular flooring is that despite its claims it does scratch, but you’d be hard-pressed to find an affordable vinyl material that doesn’t scratch – especially in a camping environment. All it takes is one sharp rock and you can kiss your flawless floorboards goodbye.
Step 3 – Everything AND the Kitchen Sink
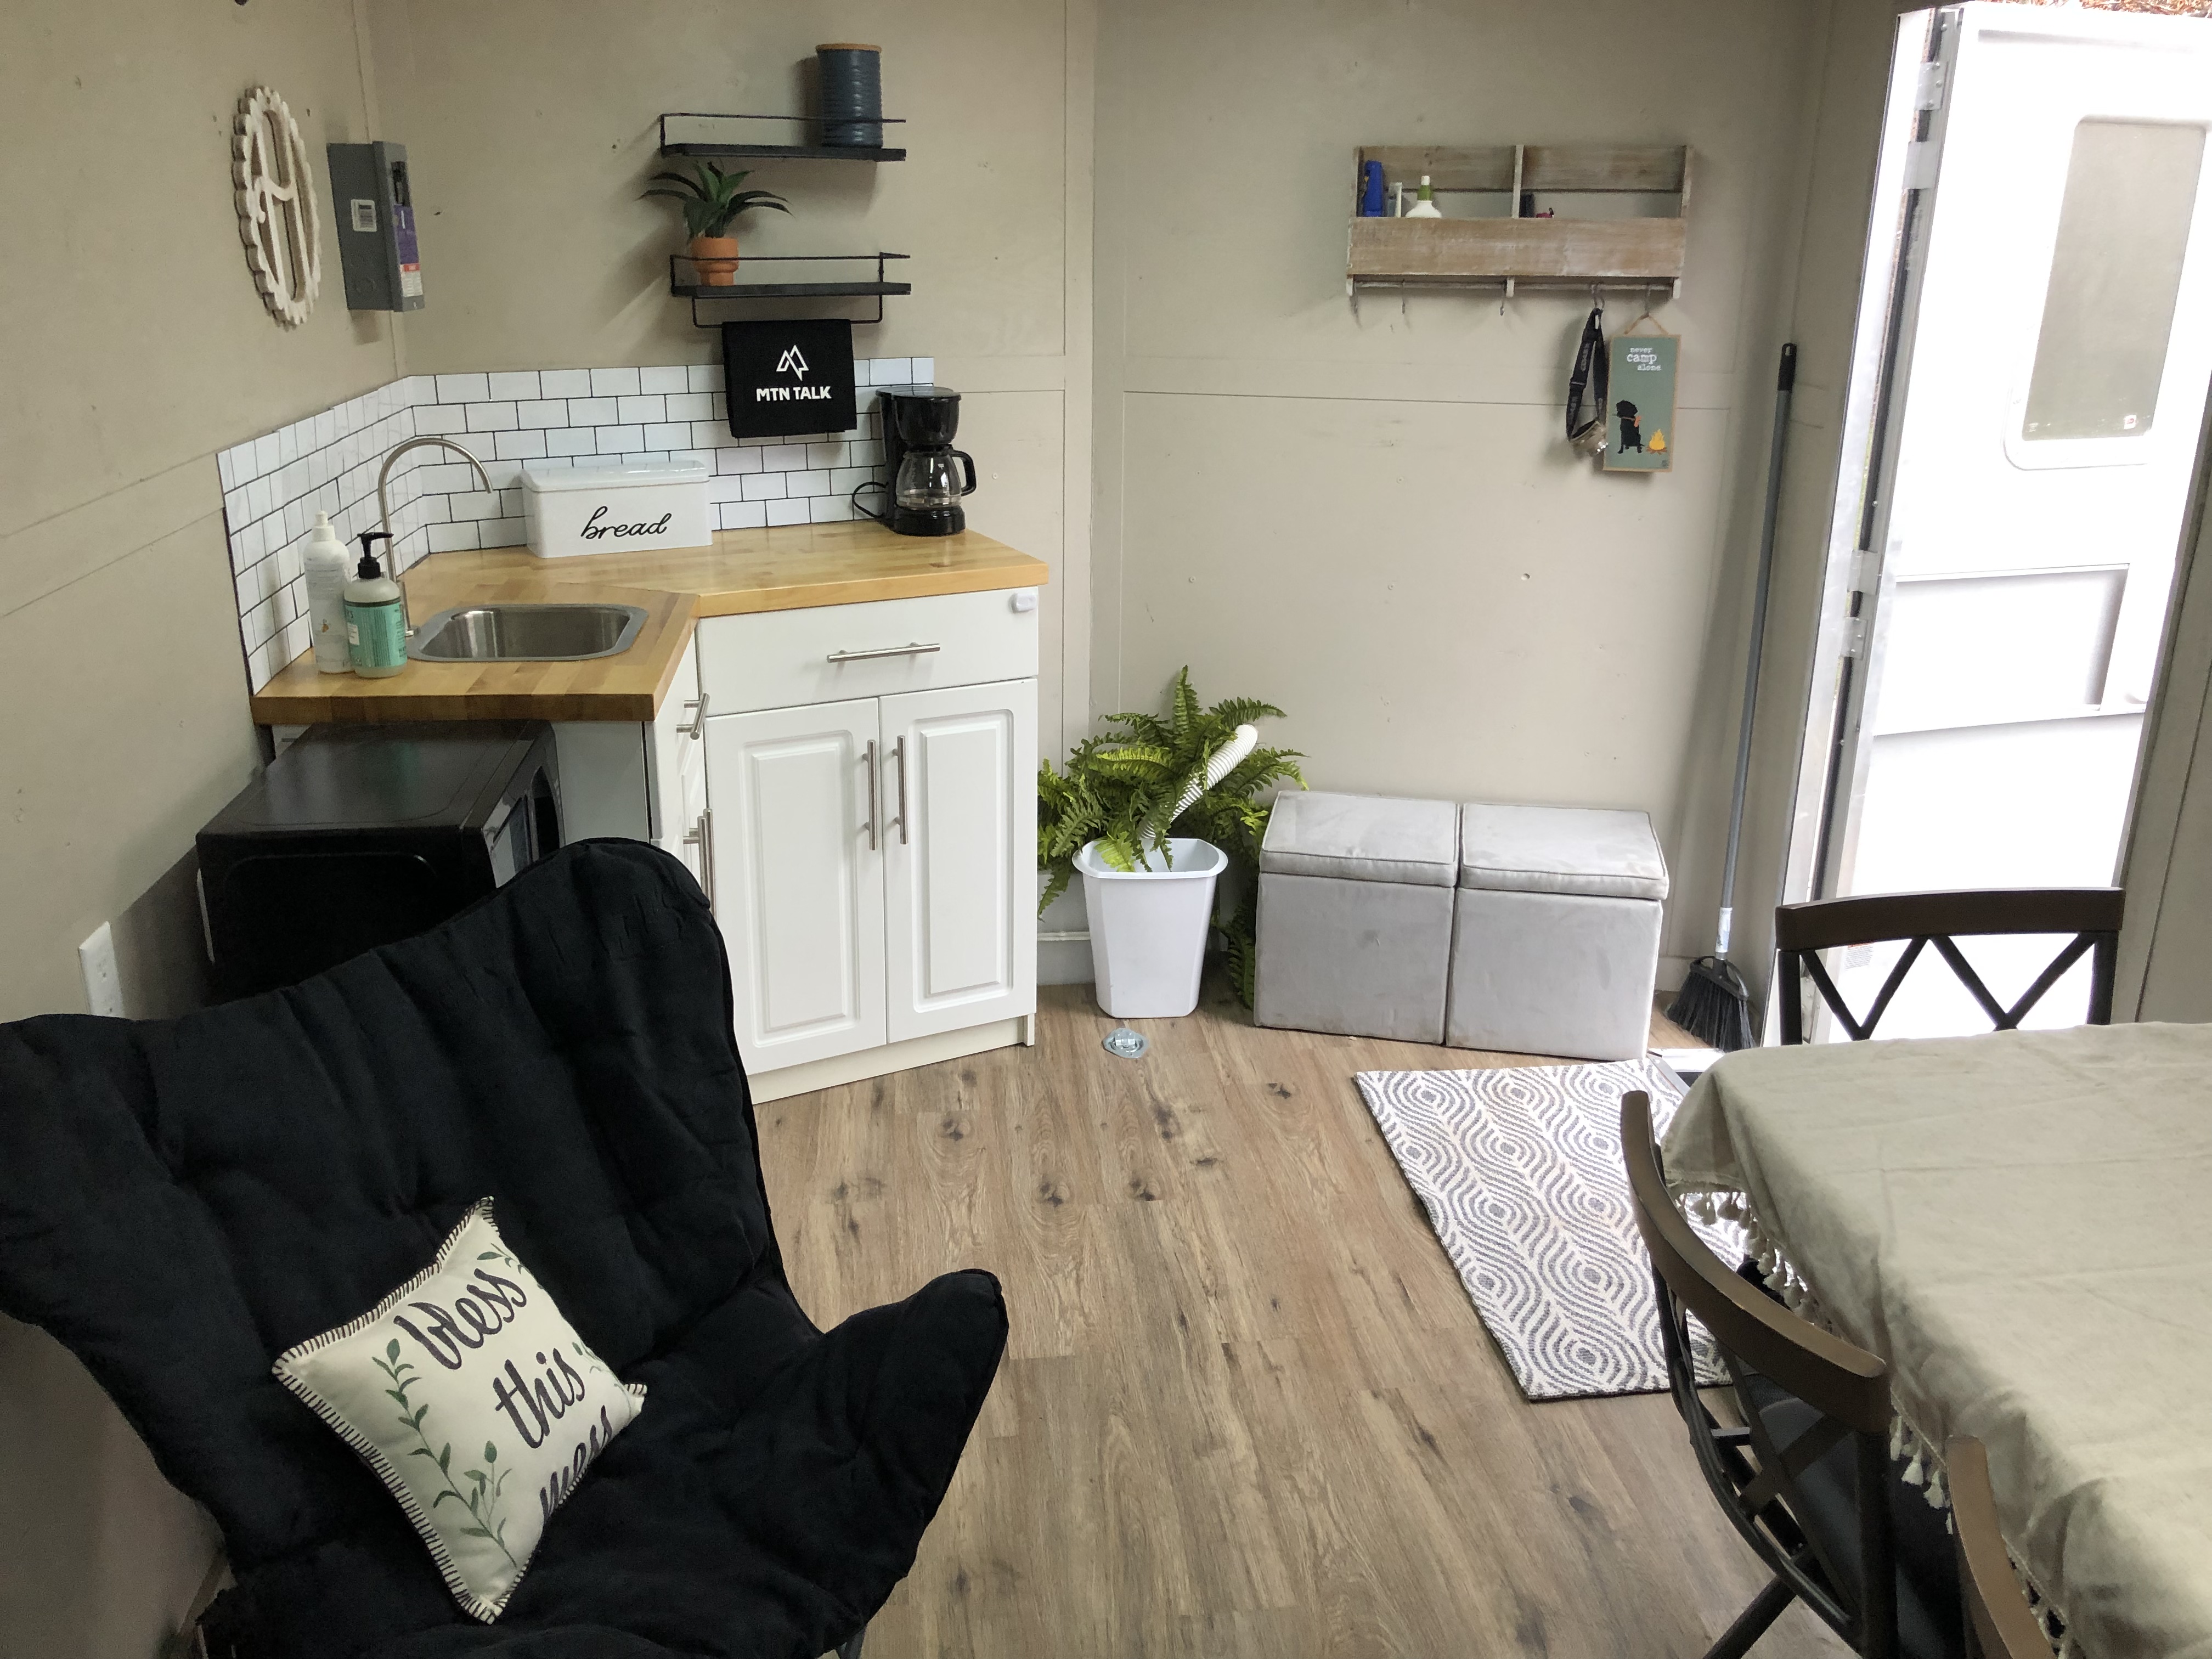
With the floors in and the paint dry, we turned our attention to the lack of kitchen. The entire trailer was still an empty box at this point. To turn this bare box into a functional camping trailer, my resourceful wifey found two wooden cabinets (for storage), a metal bar sink, a stainless steel faucet, an electric water pump, and some butcher block to build countertops.
We started from the ground up, installing the two wooden cabinets and securing them to the trailer walls with wood screws. I wasn’t 100% sure what screw length to use, but these ones didn’t appear to be poking more ”custom vent holes” through the side of the exterior wall, which was a huge plus.
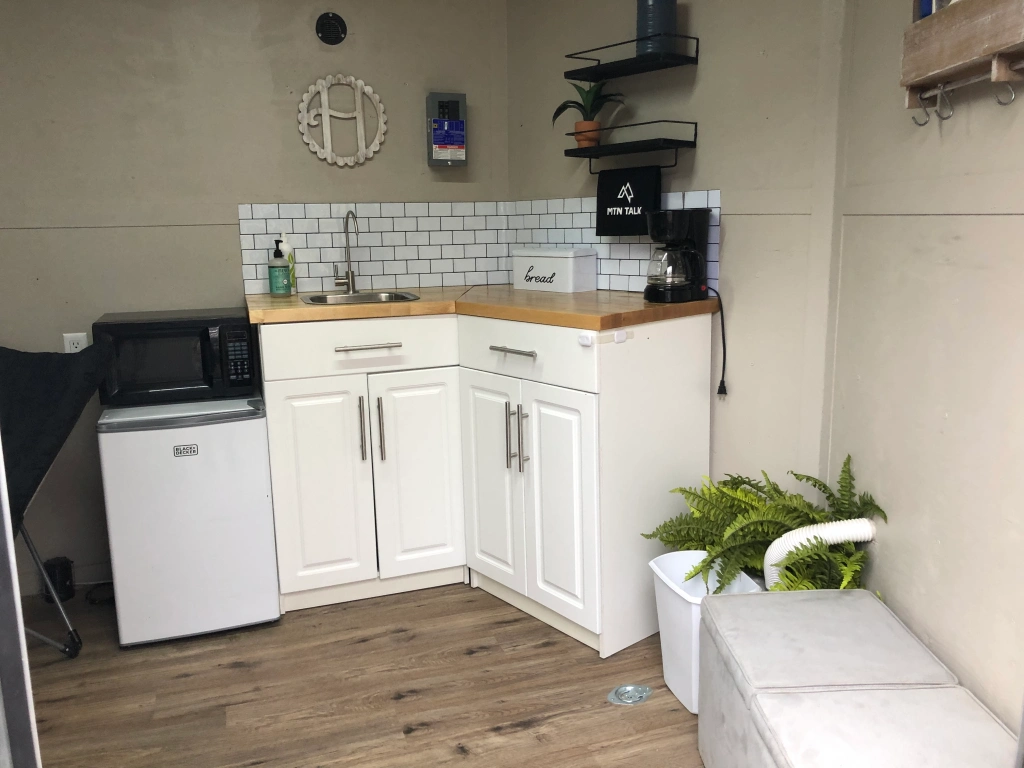
With the cabinets in place near the front of the trailer, my wife gave me the fun task of cutting butcher block for the countertop.
The world is filled with dense materials; diamonds, Thor’s hammer, and butcher block. Since this project was prior to the purchase of our nicer saws and we were rushing, I just used a jigsaw for the cut. However, I recommend using something better fit for this type of cut. Let’s just say the seams of my countertop didn’t exactly line up, leaving a crack between the two slabs of wood. I call it the “crumb catcher.”
Next came the sink installation. With a small bead of waterproof silicone around the edge, I shoved our small metal sink into the hole I cut out in the countertop, and it fit like a glove. I then installed a simple metal faucet, which we ordered online, and it started to look like a real kitchen!
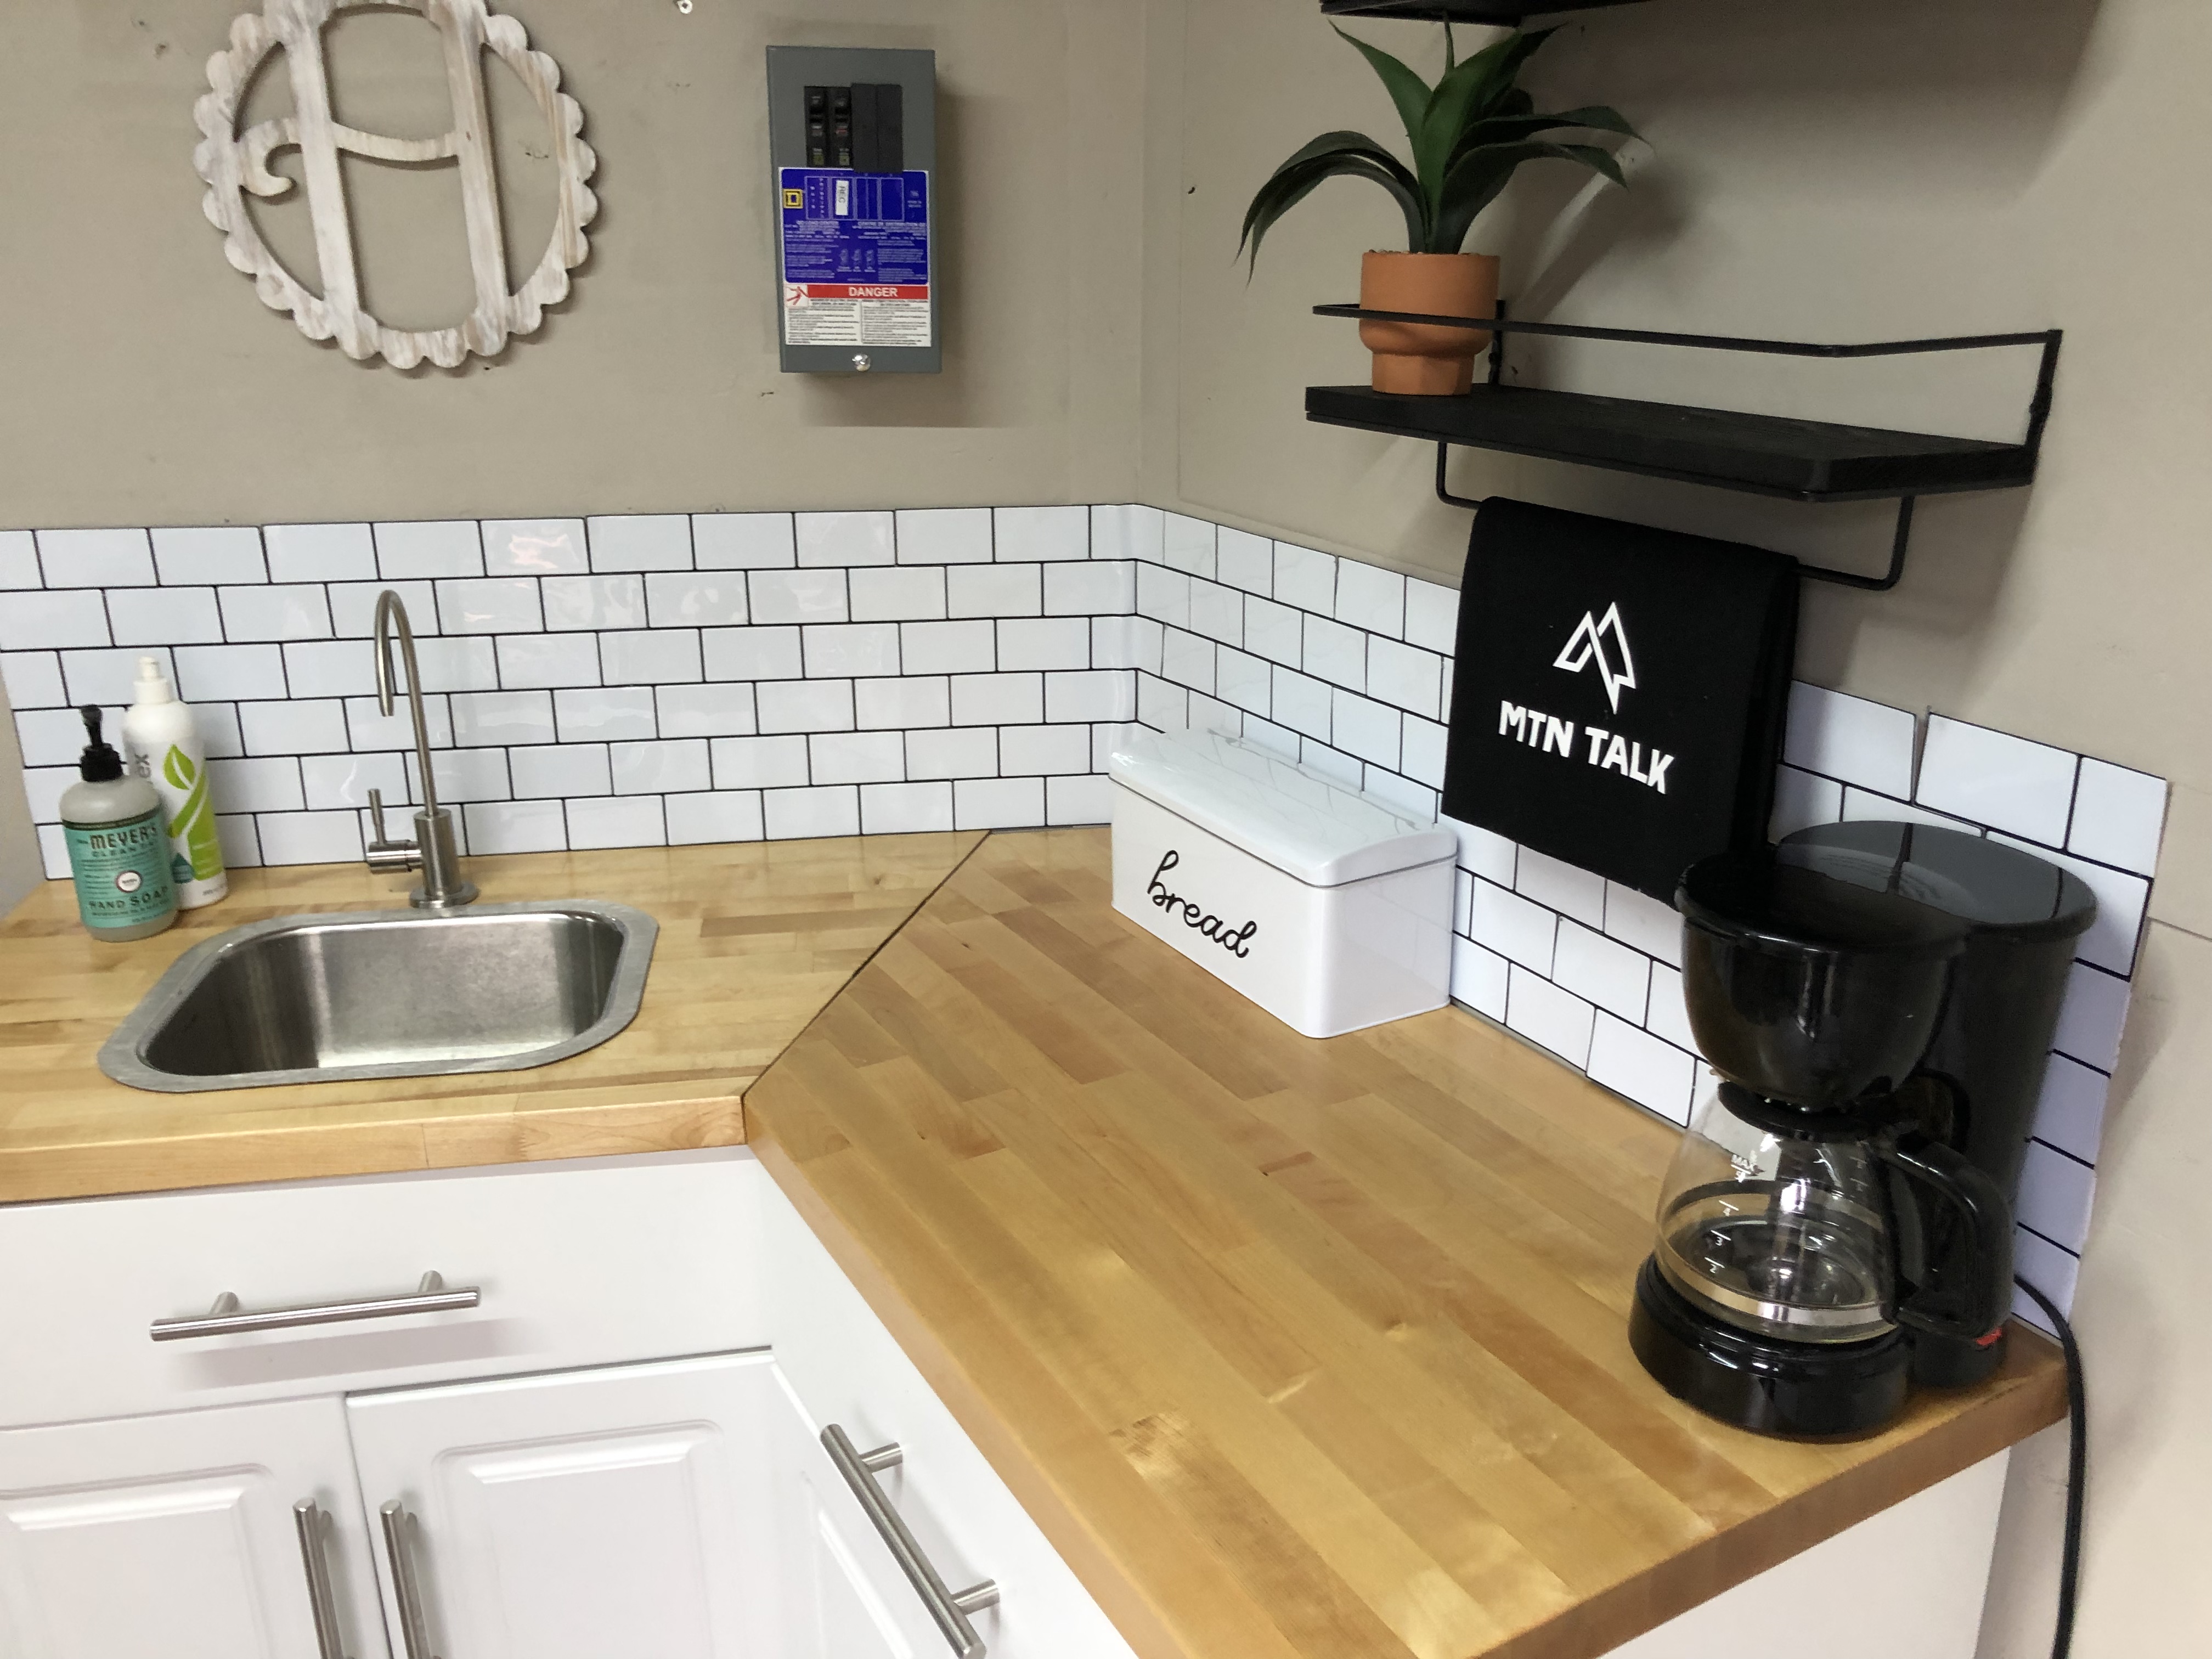

Seeing as our trailer came as an empty box with zero plumbing, my wife got creative and found a way to hook up an electric water pump that sucks water from a Culligan jug that works when we are plugged into power or when using our generator. We also put a 5 gallon jug underneath the sink to catch the waste water. Yeah, we’re high tech!
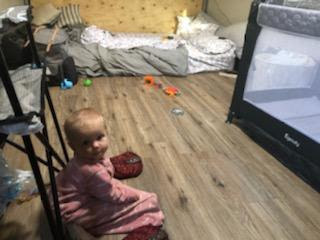
Step 4 – Time for Bed
With the kitchenette all complete, I focused on crafting a comfy bed to lay our campfire-scented heads on at the end of a long day. My wife found a way to build a bed that can be removed to accommodate various toys (side-by-sides, quads, dirt bikes, and other stuff we don’t have), and then be quickly set up at camp to sleep in the evenings. And, once set up, you can easily store totes and other equipment underneath it.

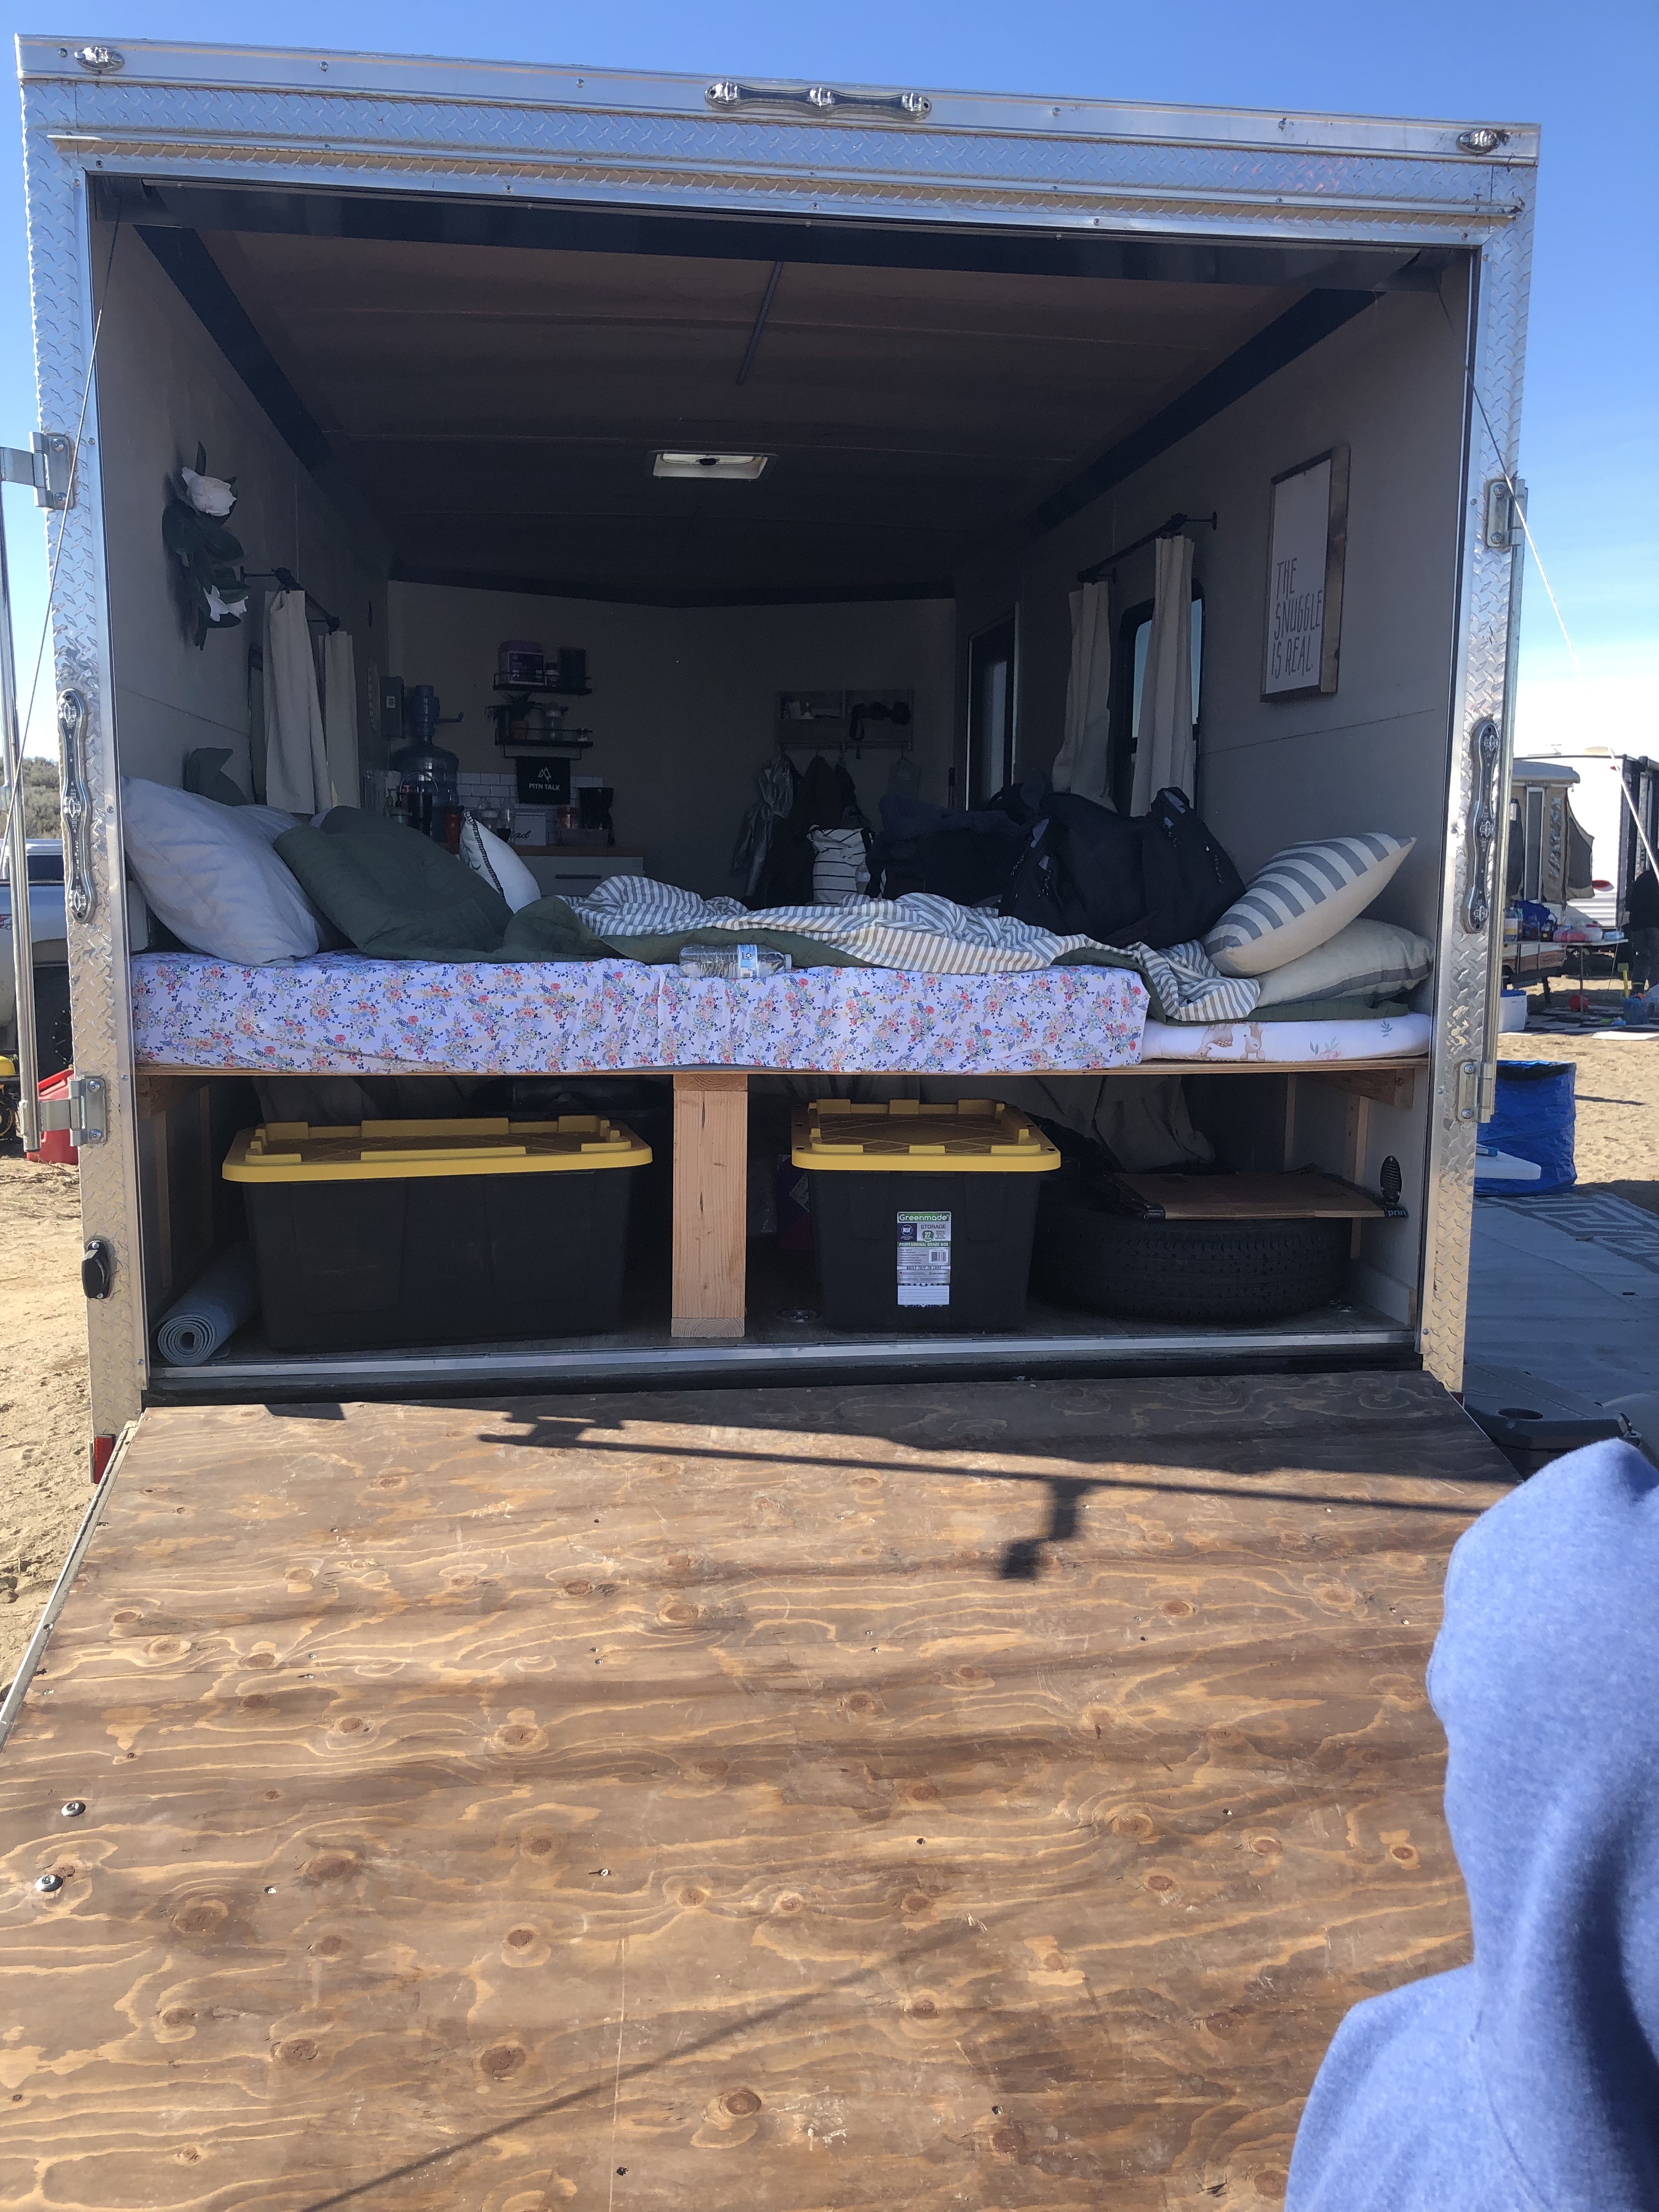
As you can see, we screwed in 2×4 wooden boards on the opposing walls near the back of the trailer. Next, we cut a sheet of plywood down to fit between the walls. Finally, we built a simple 2×6 freestanding brace to support the center of the bed. This extra support is especially important when accommodating the additional weight that comes with the Dad-Bod. It’s not my fault that s’mores with Reese’s are so darn good!

Step 5 – Bits ’n’ Pieces
To make this trailer more functional (like a toy hauler), we commandeered a portable toilet that we keep underneath our bed (along with totes filled with camping stuff). We also purchased this collection of items:
- Generator
- Folding table and chairs
- Microwave
- Space heater (this is important since the trailer is not insulated it does get quite chilly)
- Wall shelving (with perimeter bars to keep the contents secure)
- Coat hooks
- Locking cabinet/drawer straps to keep the drawers closed while the trailer is moving
- Decorative cubes (with hidden storage)
We also bought a 6-foot collapsible table, an outdoor mat, and my brother-in-law gifted us a porta-shade to complete our outside fung-shuey – I’m not even going to attempt to correctly spell this word. It sounds French, and this is ’Mericah.

Step 6 – Making it a Home
There are a few things in this life that I try to avoid; dentist appointments, Denny’s, and my wife decorating a new space. I just step back and watch as she chooses the cutest shit at Target and Home Goods. Jokes aside, she’s a talented and can make any space feel cozier (and more functional, too).
The Ultimate Test
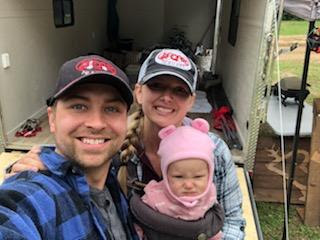
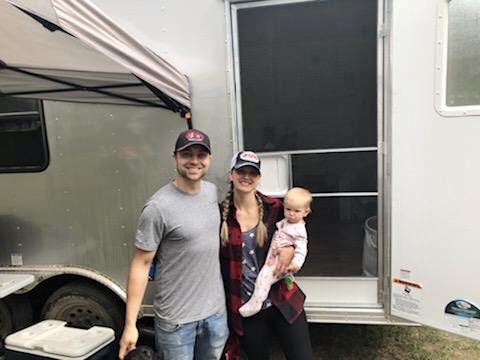
With our faux toy hauler ready to roll, we ventured out up the North Fork River in North Idaho with some of our family. Our set-up was smooth and seamless. As proud parents of two busy kids, we’ve found that having an enclosed trailer with a few amenities away from home is super helpful. We’ve taken it to Juniper Dunes and a campground near the Columbia River in Washington State, too. Every trip was successful – minus a few new scrapes to the side of the trailer. Who put that mailbox there, anyway?! I’m also happy to report I’ve avoided all coffee stands.
Have you ever converted an ordinary trailer into a toy hauler or something similar? How do you prefer to camp – tent, car, camper, or straight under the stars? Let us know in the comments below!
Be sure to subscribe to our blog to receive the freshest MTN Talk content, or follow us on Facebook and Instagram. And check out our Etsy shop here if youd like to purxhase some of our branded apparel right here: https://www.etsy.com/shop/MtnTalk?ref=simple-shop-header-name&listing.
Thank you so much for reading!

Just curious if you insulated your trailer?
LikeLike